Icon about-block-ico-1 Icon about-block-ico-2 Icon about-block-ico-3 Icon about-block-ico-4 Icon announcement-close Icon arrow-left Icon arrow-right Icon arrow-sm Icon asterisk Icon banner-transparent-vector Icon btn-callback-ico Icon careers-item-location Icon careers-item-time Icon careers-item-type Icon careers-mail-ico Icon careers-phone-ico Icon careers-search-ico Icon careers-single-hero-vector Icon careers-single-more-vector Icon careers-vector Icon check Icon close Icon dfm-image-left-vector Icon dfm-image-right-vector Icon document Icon download-popup-vector Icon dropdown Icon envelope Icon facebook Icon faq-banner-bg Icon faq-title-ico-active Icon faq-title-ico Icon featured-links-block-bg Icon figure-1 Icon figure-10 Icon figure-11 Icon figure-12 Icon figure-13 Icon figure-14 Icon figure-15 Icon figure-2 Icon figure-3 Icon figure-4 Icon figure-5 Icon figure-6 Icon figure-7 Icon figure-8 Icon figure-9 Icon file-upload Icon form-sidebar-back Icon form-step-done Icon gmap-marker-group-icon Icon gmap-marker-icon Icon header-profile-ico Icon instagram Icon link Icon linkedin Icon loader Icon mail Icon phone Icon play-yt Icon play Icon post-nav-arr-left Icon quote-banner-vector Icon quote-block-aside-vector Icon quote-contact-phone-ico Icon quote-contact-position-ico Icon sidebar-location Icon sidebar-phone Icon technology-banner-nav-left-vector Icon technology-banner-nav-right-vector Icon twitter Icon webinar-item-date-vector Icon whitepaper-img-ico-left Icon whitepaper-img-ico-right Icon whitepapers-listing-banner-ico Icon whitepapers-single-aside-vector Icon youtube Icon yt-play-button

How to Choose the Right Anderson Plug Terminals?

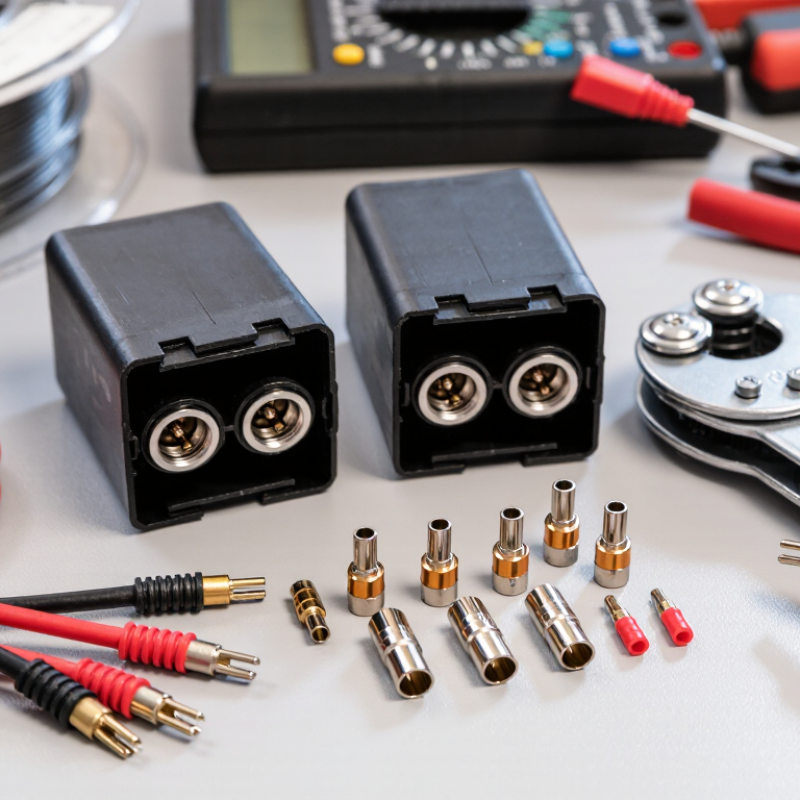
Choosing the right Anderson Plug Terminals is more than matching a connector to a cable. The terminal must suit the plug housing, wire size, and expected electrical load. A mismatch may create a loose connection, excess heat, or unreliable power. Small details matter.

Start by checking the connector series and the manufacturer’s specifications. Anderson-style housings can look similar while using different terminal sizes. Confirm the wire’s conductor area and strand type, then compare them with the terminal’s stated range. Also consider operating current, cable length, and how often the connection will be handled. These checks help narrow the options before you buy.

Installation quality matters just as much as selection. A correctly sized terminal still needs a compatible crimping tool and a clean, secure crimp. Look for a firm fit in the housing, with no exposed strands or damaged insulation. Test the finished connection gently. It should not pull free.

The working environment deserves attention, too. Vibration, dust, moisture, and temperature can affect connector performance, so follow the product guidance for the application. Do not assume that one terminal suits every setup. That assumption is easy to make. It is also where selection can go wrong.

This guide explains the practical checks behind a reliable choice, from compatibility and wire sizing to installation and inspection. When specifications are unclear, verify them with the connector manufacturer or a qualified electrical professional rather than guessing.
How to Choose the Right Anderson Plug Terminals?

What Anderson Plug Terminals Are and How They Work

A plug terminal is the metal contact inside a power connector. It joins a cable to the connector, creating a path for electrical current. The housing holds the contacts in position and helps prevent accidental contact with exposed metal. When compatible connectors are pressed together, their contacts meet firmly and complete the circuit. Simple, but important.

Most terminals attach to cable by crimping. A correctly sized crimp compresses the terminal around the conductor, making a secure electrical and mechanical connection. Too loose, and resistance or heat may increase; too tight, and strands can be damaged. That small detail matters. Choose terminals that match the connector housing, cable gauge, and expected current. Check the manufacturer’s specifications rather than relying on appearance alone, since similar-looking contacts may not fit or carry the same load.

Use a crimping tool suited to the terminal, then inspect the joint for loose strands, movement, or uneven compression. Disconnect the power source before fitting or servicing a connector. A neat crimp can still be wrong. I would also recheck the cable size before ordering; that step is easy to rush, and the mistake is frustrating to undo.

How to Choose the Right Anderson Plug Terminals

A terminal must suit the cable conductor it is crimped to. This chart shows the approximate cross-sectional area of common copper wire gauges; check that the terminal is specified for your wire size. Mating plug contacts create the electrical connection, while a correctly sized, secure crimp helps maintain a reliable current path.

Values are nominal AWG-to-metric conductor-area conversions. Select terminals and connectors using the exact cable-size and current specifications for your application.

Common Terminal Types, Materials, and Contact Designs

Choosing terminals starts with current, cable size, and duty cycle, not appearance. Common designs include flat blades, pin-and-socket contacts, and stamped spring contacts. Crimp barrels suit repeatable assembly; solder joints need clean surfaces and controlled heat. For vibration, inspect spring pressure and cable strain relief, not just the finish. Small details matter. Copper Development Association material data uses annealed copper at 100% IACS conductivity; aluminum is about 61% IACS. That difference helps explain copper’s use in compact, low-resistance paths. Copper alloys trade some conductivity for spring strength and wear resistance. Too much spring force can make mating stiff.

Tin plating is economical for many applications, while silver plating is often used where low contact resistance matters. Silver can tarnish, and tin oxide may increase resistance if the contact has poor wiping action. IEC 60512 test methods cover contact resistance, temperature rise, and mechanical durability under defined conditions. A spec sheet alone can mislead: actual performance also depends on crimp quality, alignment, and operating temperature. Check the stated current rating against cable size, then verify voltage drop across a mated pair under representative load. A continuity beep may miss a weak connection.

How to Choose the Right Anderson Plug Terminals? - Common Terminal Types, Materials, and Contact Designs

Terminal Type Typical Material and Finish Contact Design Common Application Selection Considerations
Crimp terminal Usually a copper or copper-alloy contact; may have a tin or silver finish. A barrel is mechanically crimped onto a stripped wire, while the blade portion mates with the corresponding contact. General-purpose battery leads, power cables, and equipment connections. Match the terminal to the connector housing and conductor size. Use the specified crimp tool and verify the finished crimp.
Solder terminal Typically a copper-alloy contact with a conductive plated surface. The conductor is soldered to the terminal’s wire-attachment area; the mating end remains a flat blade contact. Assemblies where soldering is part of the production or repair process. Control heat to avoid damaging the housing or contact finish. Ensure the joint is mechanically supported and free of excess solder.
Stamped blade contact Commonly made from conductive copper alloys, with plating selected for the environment and electrical requirements. A flat blade enters a complementary contact. Many genderless connector systems use identical contact shapes that mate in opposing orientations. Compact, separable DC power connections. Check blade dimensions, alignment, contact rating, and compatibility with the specific housing series.
Silver-plated contact Copper-alloy base with a silver surface finish. The plated mating surfaces provide a conductive interface; the underlying contact shape may be a flat blade or another matched profile. Applications where low contact resistance and high-current performance are priorities. Confirm the manufacturer’s current rating and operating conditions. Silver can tarnish, so follow the specified storage and maintenance guidance.
Tin-plated contact Copper-alloy base with a tin surface finish. A plated blade contact mates with its corresponding contact surface. General electrical connections, especially where cost and broad availability are important. Verify that the rating and environmental protection suit the intended load and exposure. Avoid assuming it is interchangeable with a differently plated contact.
High-current contact Typically a substantial copper-alloy contact; the plating and construction vary by connector design. A larger contact interface or multiple contact points may be used to support higher current within the connector’s rated limits. Battery, inverter, charger, and other power-distribution connections. Choose by the complete connector’s rated current, wire size, duty cycle, temperature rise, and mating compatibility—not by appearance alone.

How to Match Terminals to Wire Size and Connector Series

Matching an Anderson plug terminal to wire starts with the conductor, not the connector’s appearance. Check the wire’s actual cross-sectional area or AWG size, then compare it with the terminal’s stated range. A terminal that is too small may damage strands during crimping. One that is too large can leave a loose, unreliable connection. Small differences matter.

Next, confirm the connector series. Similar-looking housings may use terminals with different contact dimensions, retention features, or current ratings. The terminal must seat fully and lock into the intended housing. Never assume two parts are compatible because they fit loosely. Check the connector and terminal specifications together, including wire range and application limits.

Use a crimp tool suited to the terminal, and follow the specified strip length. No guesswork here. After crimping, look for cut strands, uneven compression, or exposed conductor beyond the barrel. A gentle pull test can reveal a weak crimp, though it does not replace the specified inspection method. I’ve seen wire size treated as the only selection factor; it is an easy detail to miss, but series compatibility matters just as much.

How to Check Current, Voltage, and Environmental Requirements

How to Choose the Right Anderson Plug Terminals?

Before selecting Anderson plug terminals, check the circuit’s normal current and peak load. A motor may draw several times its running current during startup. Compare both figures with the terminal’s rated current, then account for cable size, contact temperature, and installation conditions. A rating is not a guarantee under every setup. Heat builds quickly in a cramped enclosure.

Check voltage at the highest expected system level, including charging conditions and transient spikes. Confirm that the terminal’s published rating exceeds that value, and verify compatibility with the cable insulation. For environmental protection, inspect the complete connection—not just the plug. IEC 60529 defines IP67 as dust-tight protection and temporary immersion up to one metre for 30 minutes. That rating only applies to equipment tested in the specified configuration; an exposed cable entry can still let moisture in.

Use the terminal maker’s technical datasheet for derating curves and temperature limits, then check those values against the equipment’s service conditions. A trailer connection may face road spray, vibration, and grit, while an indoor battery enclosure may mainly need heat management. Keep a little margin. It is easy to overlook corrosion at the crimp, especially after repeated wet-dry cycles. One useful check: inspect the finished crimp and confirm the cable cannot rotate or pull free. I would still recheck the assumptions after installation.

How to Select and Verify the Right Terminal for Your Application

How to Choose the Right Anderson Plug Terminals?

Selecting the right terminal starts with the exact connector housing and wire size. A terminal that fits loosely or forces the strands can create a poor connection. Check the terminal’s specified wire range, current rating, and compatibility with the housing series. Consider the cable’s strand count and insulation diameter, too. They affect how cleanly the wire enters the barrel. Looks simple. It isn’t.

Match the crimp tool to the terminal, rather than relying on pliers or a similar-looking die. Strip only enough insulation to expose the conductor without nicking or losing strands. After crimping, inspect the barrel for even compression and confirm that insulation is supported without being trapped in the conductor crimp. A common oversight is choosing by wire gauge alone; two cables with the same gauge can have different strand and insulation dimensions.

Verify each connection before installation. Check that the contact locks into the housing and does not slide back when the wire is gently pulled. Use the terminal maker’s specified pull-test method and acceptance limits; a casual tug is not a substitute. Then inspect polarity and test voltage drop or temperature under an appropriate load, staying within rated limits. If a crimp looks slightly uneven, pause and investigate. It may still work, but “probably fine” is not a useful inspection standard.

MSIRobot