A coffee pot lid seems like a small part until it rattles during pouring or lets steam escape onto your hand. The right choice can help keep coffee warm, reduce spills, and make everyday handling easier. Still, no lid solves every problem. Pot shapes, rim sizes, and materials vary more than product photos suggest.
These seven tips focus on practical checks: measure the opening, compare the lid’s shape, and look for a secure but manageable fit. Fit comes first. A lid that sits neatly on the counter may wobble on a curved rim. Check whether the handle stays cool enough to grasp and whether the lid allows smooth pouring without blocking the spout. Material matters, too. Glass, stainless steel, and heat-resistant plastics can differ in weight, durability, and cleaning needs. Follow the pot maker’s care instructions, especially before placing a lid in a dishwasher or near direct heat.
Coffee Pot Lids should also be easy to remove for filling and washing. Small details matter. Look for stains, worn seals, loose knobs, or trapped coffee residue; these can signal that a replacement is due. I’d be cautious about “universal fit” claims unless the listed dimensions match your pot. It is easy to overlook the rim shape. These tips offer a practical starting point, not a guarantee that one lid will suit every coffee pot.
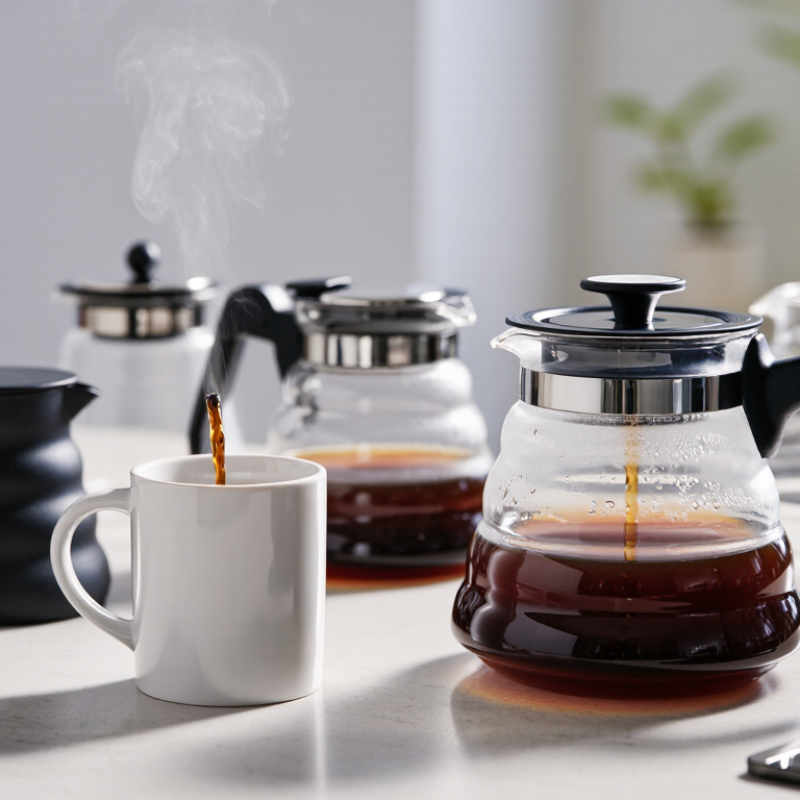
Before choosing a replacement lid, measure the coffee pot’s opening rather than guessing from its capacity. Use a ruler across the widest part of the rim, from edge to edge. A pot that holds eight cups does not necessarily share a lid size with another eight-cup pot. Check whether the rim is round, oval, or slightly tapered, too. Even a small mismatch can leave a gap where heat escapes or the lid shifts when pouring.
Look for the pot’s model information on its base, handle, or instruction booklet, then compare the lid’s shape and attachment points. Some lids sit inside the rim; others rest on top or lock into small notches. Check for a center opening, steam vent, or raised handle that could interfere with a replacement. If the original lid is available, compare its underside and measure its outer and inner edges. A flexible tape can help with curved rims, though it may not give a perfectly exact reading. That part can be fiddly. When measurements fall between sizes, contact the maker or seller with the pot’s details before ordering. Guessing may work, but it is not a reliable fit test.
These values are exact inch-to-millimeter conversions, not standard lid sizes. Measure your pot’s rim across its center, then check that the replacement lid’s stated fit range matches the measurement and rim shape.
A coffee pot lid faces hot steam, repeated washing, and occasional knocks against a sink. The Specialty Coffee Association’s brewing guidance places ideal brewing water around 90–96°C, so check a lid’s stated temperature limit against real use. A lid that feels cool outside may still trap hot condensation underneath. Handle it carefully.
Material data helps, but it is not the whole story. Engineering Toolbox’s thermal-conductivity tables list stainless steel near 15 W/m·K, compared with roughly 0.1–0.22 W/m·K for polypropylene. Steel spreads heat quickly; polypropylene insulates better, but can warp if its temperature rating is too low. Silicone seals can stay flexible, though their ratings vary by formulation. That matters. Look for explicit food-contact and heat-resistance information, not just a material name. Fit matters too. A loose lid can leak steam, while a tight one may be awkward to remove with wet hands. Conductivity alone cannot predict safety; thickness, shape, and contact with hot liquid change performance. I would compare those details, even though product labels do not always make them easy to find.
A good coffee pot lid should sit evenly on the rim, without rocking or leaving visible gaps. Check the seal around the edge for cracks, warping, or loose sections. A snug fit helps limit spills and slows heat loss, though most lids are not airtight. That distinction matters.
Match the lid to the pot’s shape and size. Even a small mismatch can let steam escape or make pouring awkward. If the pot has a gasket, check that it is seated properly and easy to remove for cleaning. Look for trapped coffee oils or dried residue; they can interfere with the seal over time. A little patience helps.
Heat retention is worth testing at home. Pour in hot water, fit the lid, and check the temperature after 15 minutes, using the same conditions for each comparison. Notice whether the lid stays secure when you lift and tilt the pot gently. Avoid judging from one test alone: room temperature, fill level, and how often you pour can change the result. A lid that keeps coffee hot but is difficult to clean may not be the best everyday choice.
A coffee-pot lid matters most when the pot is full, hot, and moving. The National Coffee Association’s 2024 National Coffee Data Trends report found that 67% of U.S. adults had coffee the previous day. For many people, lid handling is a daily task. Small flaws add up.
Test the fit with cool water before brewing. The lid should stay seated as you tilt the pot, but it should not jam when you need to remove it. Check whether the spout pours cleanly without forcing liquid under the lid. A narrow stream is easier to guide into a mug. SCA brewing guidance recommends water between 195°F and 205°F, so steam deserves attention, too. Choose a vent that releases it away from fingers and faces. Not straight up.
Everyday handling is easy to overlook. Try opening the lid with one hand, then check whether its knob stays cool and offers a secure grip. Look for corners or seams that trap coffee residue; they can be awkward to clean, even when the lid appears tidy. A snug fit is useful, but “snug” should not mean difficult to lift. That balance is a little subjective, so consider who will use the pot and how they pour.
| Tip | What to Assess | Why It Matters | Simple Check |
|---|---|---|---|
| 1. Check the fit | Look for a lid shaped and sized for the pot’s opening, with a stable rim or locking feature if the design uses one. | A secure fit helps keep the lid in place while pouring and reduces splashes during normal handling. | Place the lid on the pot and gently tilt it over a sink. It should remain seated without forcing it. |
| 2. Assess the pour opening | Check that the lid’s opening lines up with the pot’s spout and is wide enough for a steady stream. | A well-aligned opening lets coffee flow freely and can help prevent drips or a blocked pour. | Pour water slowly into a cup and observe whether it flows smoothly from the spout. |
| 3. Look for effective venting | Consider whether the lid includes a vent or enough clearance for air to enter as liquid pours out. | Airflow can help prevent glugging and uneven pouring. A vent should not be so open that it invites unnecessary spills. | Pour a small amount of water at a steady angle and check for an even stream rather than repeated surges. |
| 4. Consider heat-safe materials | Review the stated material and temperature guidance, especially for lids that may contact hot coffee or a warm pot. | Materials intended for the pot’s normal use are less likely to deform or become uncomfortable to handle. | Check the product instructions for heat limits and whether the lid is suitable for the intended brewing setup. |
| 5. Choose an easy-to-clean design | Inspect seams, vents, hinges, and removable parts for areas where coffee residue could collect. | Smooth surfaces and accessible parts make regular cleaning easier and help prevent lingering odors or buildup. | See whether the lid can be rinsed or taken apart according to its care instructions. |
| 6. Test everyday handling | Check how easily the lid lifts, closes, and stays in place, including whether its handle is comfortable to grasp. | A lid that is simple to operate is more convenient during repeated refills and serving. | Open and close it with a dry hand, then repeat with a damp hand while keeping the pot stationary. |
| 7. Confirm compatibility | Match the lid’s dimensions and attachment style to the specific pot, including the spout position and any hinge or locking points. | Similar-looking lids may differ in shape or fit, so measurements and design details matter when replacing one. | Compare the lid with the pot opening and check the maker’s fit or care information before purchasing. |
A coffee pot lid looks simple until old coffee dries around its rim or hinge. Choose a design you can remove without forcing it, especially if the lid has narrow grooves or a built-in vent. Smooth surfaces are easier to wipe, while detachable parts can make a deeper wash possible. Check the care instructions before using a dishwasher; heat can warp some lids or loosen their seals. A soft brush helps reach tight corners. Avoid assuming that a quick rinse is enough.
Replacement availability matters, too. Before buying a pot, look for lids sold separately and check how the seller identifies compatible models. Keep the pot’s model number and measure the lid’s diameter if you may need a substitute later. Small differences can prevent a lid from sitting securely. That detail is easy to overlook. A lid that traps moisture or no longer fits can make daily cleaning frustrating, even if the pot itself still works well. I used to focus mainly on appearance; that was not very practical. A plain, washable lid with a clearly listed replacement may serve you longer than a complicated one.
MSIRobot