2026 How to Choose the Best Chain Adjuster for Your Needs
Choosing the right Chain Adjuster is about more than finding a part that fits. It helps maintain correct chain tension and wheel alignment, both essential for smooth, predictable operation. A poorly matched adjuster can make routine maintenance frustrating or leave the axle difficult to position accurately. Small differences matter.
Start with your vehicle’s make, model, year, and existing axle or swingarm design. Check the manufacturer’s specifications before comparing adjuster styles, dimensions, and mounting points. Then consider construction: steel and aluminum options differ in weight, corrosion resistance, and durability. Look closely at the threads, adjustment range, locking method, and whether the kit includes necessary hardware. Clear adjustment marks can also help you make consistent changes on both sides. They are useful, but not a substitute for checking alignment.
The best choice depends on how and where you ride, how often you service the chain, and whether you value simple adjustment or added convenience. For regular road use, secure fit and dependable adjustment may matter more than appearance. Off-road conditions can place greater demands on exposed components, so material and protection deserve closer attention. I would not assume a more expensive adjuster is automatically better; compatibility and sound installation matter more. And one detail is easy to overlook: after adjustment, recheck chain slack using the procedure specified for your vehicle. This guide explains the key features to compare, common fitment mistakes, and practical questions to ask before buying. A careful check now can save time later.
What a Chain Adjuster Does and How Its Designs Differ
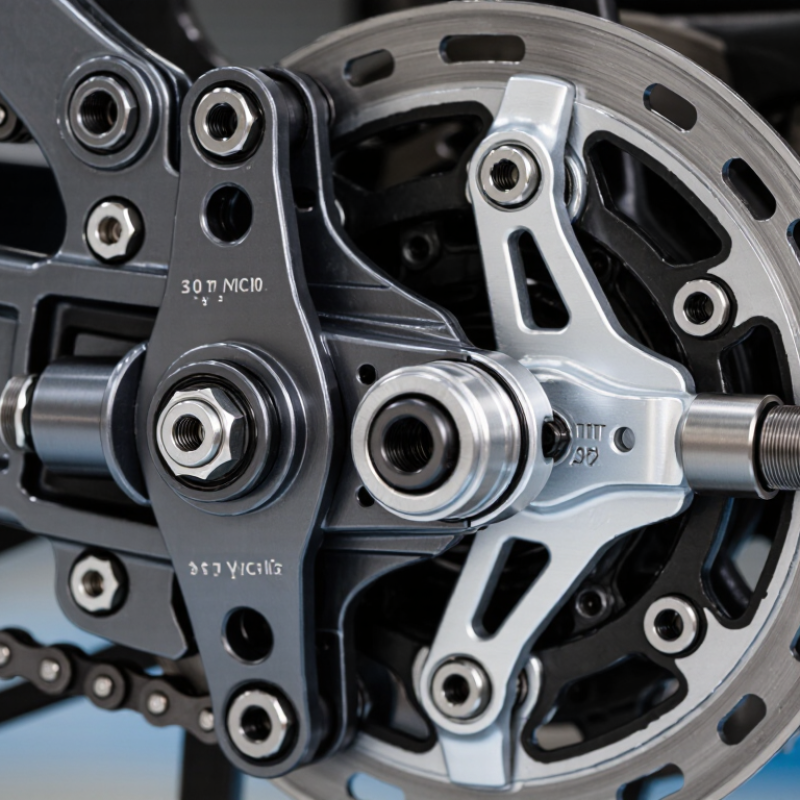
A chain adjuster moves the rear axle to set chain slack and help keep the wheel aligned. On a motorcycle, that small change affects how the chain runs across the sprockets. Too much slack can cause clatter; too little can place extra strain on components. Check the equipment manual for the correct slack measurement, since the required range varies. That detail matters.
Adjuster designs change how this movement is made. Threaded adjuster bolts offer fine, gradual changes and often use locknuts to hold the setting. Cam-style plates move the axle through marked positions, which can make adjustments quicker but less precise between marks. Sliding-block designs guide the axle along a track. They are straightforward, though dirt or wear can make movement uneven. Not every design fits every frame.
In practice, compare the marks on both sides, then rotate the wheel and recheck chain slack at several points. A chain can wear unevenly. A single reading may mislead. I would not rely on alignment marks alone; they can be hard to read or slightly inconsistent. Measure carefully, secure the adjusters, and confirm the axle is firmly seated before riding. Small errors add up.
How to Match an Adjuster to Your Chain and Vehicle
A chain adjuster must fit both the chain’s dimensions and the vehicle’s axle system. Check chain pitch, inner width, and roller size; matching pitch alone is not enough. ANSI/ASME B29.1 dimensional tables distinguish chain sizes that may share a pitch but differ in width. For example, 520 and 530 chains both have a 15.875 mm pitch, while their nominal inner widths differ: 6.35 mm and 9.53 mm. A mismatched adjuster or sprocket can bind or wear unevenly.
Then inspect the vehicle. Compare the adjuster’s mounting style, axle diameter, thread pitch, and available travel with the swingarm and axle blocks. Confirm the vehicle’s manual specifies the correct chain size and slack; the required slack varies by model and suspension position. ISO 606 provides dimensional references for precision roller chains, but it does not replace vehicle-specific service instructions. Measure carefully. I still double-check stamped chain codes, since wear and dirt can make them hard to read.
Before buying, compare the adjuster’s bolt length and contact points with the existing assembly. Check that both sides can be aligned evenly and that the axle can move through the required adjustment range. A small mismatch matters. If specifications conflict, pause and verify them with a qualified mechanic rather than forcing the part into place.
Which Materials and Features Affect Durability
A chain adjuster’s service life depends on its material, finish, and how accurately it fits the machine. Steel adjusters usually handle heavy loads well, but untreated surfaces can rust after wet rides or washing. A protective coating helps, though chips around bolt heads may expose bare metal. Stainless steel resists corrosion, but it is not automatically stronger than every treated steel option. Check the specified material and fit, not just the finish.
Aluminum adjusters reduce weight and resist corrosion, making them useful where weight matters. However, softer aluminum threads can wear if bolts are overtightened or repeatedly adjusted. A steel adjuster bolt paired with an aluminum block can offer a practical balance, provided both parts fit correctly. Small details matter. Clear alignment marks, broad contact surfaces, and accurately cut threads make adjustment more consistent. Poorly formed threads can bind, inviting extra force and damage.
Look closely at the hardware, too. Locknuts that stay secure, smooth adjuster screws, and edges free from burrs are useful signs of careful manufacture. Rust starts quietly. After riding in rain or dust, wipe the adjuster clean and check for corrosion, looseness, or uneven chain alignment. There is no perfect material choice; harsh conditions and neglected maintenance can shorten the life of even a well-made part. Follow the machine’s service guidance, and avoid forcing an adjuster that feels stuck.
2026 How to Choose the Best Chain Adjuster for Your Needs: Materials and Durability
Typical material density (g/cm³): Carbon steel and 304 stainless steel are denser than titanium and 6061-T6 aluminum. Density alone does not determine durability: also check the adjuster’s load rating, corrosion protection, fatigue resistance, and compatibility with your chain and riding conditions. Values are typical nominal densities; exact values vary by alloy and specification.
How to Compare Adjustment Range, Fit, and Ease of Use
A chain adjuster should match the motorcycle’s axle slots, swingarm, and chain specification—not just look sturdy. Check the service manual for the required chain slack and adjustment procedure. The available adjustment range must cover normal wear without leaving the axle near the end of its slot. Measure twice. Also verify bolt diameter, thread pitch, and left-right alignment; a part that fits one side may still bind on the other.
Ease of use matters during routine maintenance. Clear alignment marks, accessible fasteners, and room for a common tool can make small corrections less frustrating. Look for adjustment increments you can repeat, rather than relying on rough visual guesses. The U.S. Department of Energy’s 2014 industrial drive-system sourcebook lists chain-drive efficiency as high as 98% under suitable conditions. That figure is not a motorcycle performance promise, but it highlights why proper alignment matters. ISO 606:2015 specifies dimensions for precision roller chains, yet it does not confirm that an adjuster fits a particular motorcycle. Compare the manual’s specifications with the adjuster’s listed range. I still find printed scale marks easy to misread when dirt covers them, so recheck alignment after tightening the axle.
How to Choose an Adjuster for Your Riding Conditions and Budget
Choose a chain adjuster around your riding conditions, not appearance alone. A commuter riding on dry pavement may need a simple, sturdy adjuster with clear alignment marks. Frequent rain, grit, or muddy trails make corrosion resistance and easy cleaning more important. Check the adjuster’s fit against your motorcycle’s axle size and swingarm design. Your service manual is the best place to confirm specifications and adjustment procedures. Small details matter.
Tips: Before buying, compare the adjustment range with your bike’s needs. Check whether replacement bolts or spacers are included. Keep a little budget for a suitable wrench or other tools.
Price is only part of the cost. A low-cost part can become a poor value if it fits loosely or makes alignment difficult. Higher-priced materials are not automatically better for every rider, either. Consider how often you ride, how harsh the conditions are, and whether you can inspect the hardware regularly. I would not rely on alignment marks alone; they can be hard to read or may not match perfectly. Measure both sides carefully, then recheck chain slack after tightening the axle. It takes a few extra minutes. That step is easy to rush.
