Icon about-block-ico-1 Icon about-block-ico-2 Icon about-block-ico-3 Icon about-block-ico-4 Icon announcement-close Icon arrow-left Icon arrow-right Icon arrow-sm Icon asterisk Icon banner-transparent-vector Icon btn-callback-ico Icon careers-item-location Icon careers-item-time Icon careers-item-type Icon careers-mail-ico Icon careers-phone-ico Icon careers-search-ico Icon careers-single-hero-vector Icon careers-single-more-vector Icon careers-vector Icon check Icon close Icon dfm-image-left-vector Icon dfm-image-right-vector Icon document Icon download-popup-vector Icon dropdown Icon envelope Icon facebook Icon faq-banner-bg Icon faq-title-ico-active Icon faq-title-ico Icon featured-links-block-bg Icon figure-1 Icon figure-10 Icon figure-11 Icon figure-12 Icon figure-13 Icon figure-14 Icon figure-15 Icon figure-2 Icon figure-3 Icon figure-4 Icon figure-5 Icon figure-6 Icon figure-7 Icon figure-8 Icon figure-9 Icon file-upload Icon form-sidebar-back Icon form-step-done Icon gmap-marker-group-icon Icon gmap-marker-icon Icon header-profile-ico Icon instagram Icon link Icon linkedin Icon loader Icon mail Icon phone Icon play-yt Icon play Icon post-nav-arr-left Icon quote-banner-vector Icon quote-block-aside-vector Icon quote-contact-phone-ico Icon quote-contact-position-ico Icon sidebar-location Icon sidebar-phone Icon technology-banner-nav-left-vector Icon technology-banner-nav-right-vector Icon twitter Icon webinar-item-date-vector Icon whitepaper-img-ico-left Icon whitepaper-img-ico-right Icon whitepapers-listing-banner-ico Icon whitepapers-single-aside-vector Icon youtube Icon yt-play-button

What Is 3D Lenticular Printing?

I can write the introduction, but no article or verifiable expert quotation was included. I shouldn’t invent an expert’s name or attribute a quotation without a source. Please provide the article or the expert quote you want included.

What Is 3D Lenticular Printing?

Definition and Core Features of 3D Lenticular Printing

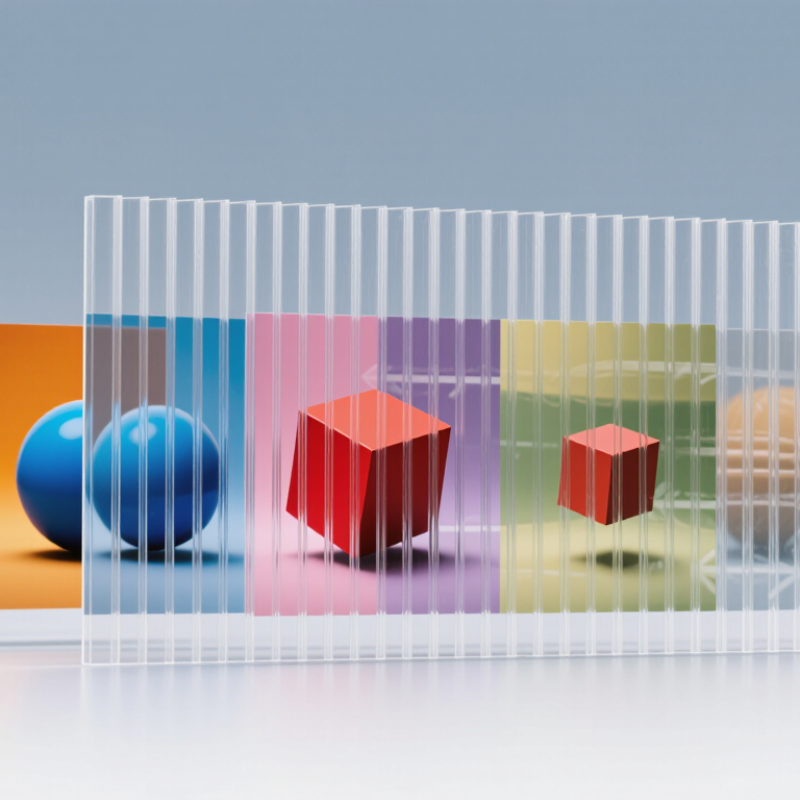
3D lenticular printing places a clear sheet of tiny curved lenses over a specially prepared image. Beneath the lenses, narrow image strips are interlaced in a precise sequence. Each lens directs different strips toward the viewer as the viewing angle changes. The eye reads those shifts as apparent depth, movement, or a change between images. Nothing physically moves. The effect comes from coordinated images, lens geometry, and viewing position.

A printed subject may seem to sit behind the surface, like lettering on a shop display or a ball hovering above a background. The strongest results usually rely on clear separation between foreground and background, controlled contrast, and a suitable viewing distance. Alignment matters. If the printed strips do not match the lens pitch, edges can look doubled or colors may seem uneven. That sounds simple. It isn’t always. Lighting and the viewer’s angle can change how convincing the effect feels, and a crowded image may lose clarity. Lenticular depth is an optical illusion, not a substitute for actual three-dimensional structure. Designers often test small proofs before producing a larger sheet, though even a good proof may not predict every viewing condition. It is a useful process, but a slightly fussy one.

What Is 3D Lenticular Printing? — Lens Pitch and Lenticule Width

Lenticular printing places interlaced image strips beneath a sheet with fine parallel lenses, called lenticules. The lenses direct different image views toward different viewing angles, creating a 3D effect. The chart shows the approximate width of one lenticule at example lens pitches; widths are calculated as 25.4 mm divided by lenses per inch. Actual pitches vary by material and application.

How Lenticular Lenses Create Depth and Motion

What Is 3D Lenticular Printing?
How Lenticular Lenses Create Depth and Motion

A lenticular print places narrow image strips beneath a ridged plastic lens sheet. Each ridge acts like a tiny viewing channel. As your head shifts, the lens directs different strips to each eye or viewing angle. Your brain reads the offset as depth, or the changing images as motion. The effect is physical, not a screen animation. A printed ball can seem to turn as you walk past it. Small alignment errors, however, can create ghosting or a jumpy transition.

Image preparation must match the lens pitch, measured in lenses per inch, and the intended viewing distance. A 2024 Grand View Research report valued the global commercial printing market at USD 501.36 billion in 2023, with projected growth through 2030. That broad market figure does not measure lenticular printing specifically. It does show why careful finishing and print quality remain important across commercial print work. In practice, test prints help reveal whether the depth feels convincing from the expected viewing position. Sometimes it still feels a little artificial.

Tips: Choose a viewing distance before designing. Keep key details away from image edges, where transitions may look less stable. Test under the lighting your audience will actually see.

Key Steps in Producing a Lenticular Print

What Is 3D Lenticular Printing?

Key Steps in Producing a Lenticular Print

Producing a lenticular print starts with a clear visual plan. Decide whether the image should show depth, motion, or a changing view. For a 3D effect, prepare several images of the subject from slightly different angles. Keep the subject’s position and lighting consistent; mismatched shadows can make the final image feel jumpy. Small shifts matter.

Next, the images are interlaced into narrow strips that correspond to the ridges, or lenticules, on the plastic lens sheet. The lens pitch must be measured or calibrated for the specific material and viewing distance. A test strip can reveal blurred edges or unwanted image changes before the full print is made. Guessing is tempting, but often costly. Print the interlaced file at a suitable resolution, then align it carefully with the lens. Even a slight sideways offset may cause ghosting. Trim the piece only after checking the effect across several viewing angles.

Inspection should happen under ordinary viewing conditions, not just on a bright production screen. Check for color shifts, visible striping, and whether the intended depth reads naturally. Some images simply work better than others, and that is worth admitting early. A second test may be needed. Calibration records, including lens type and print settings, help make later runs more consistent.

Materials and Design Factors That Affect Print Quality

3D lenticular printing uses a ridged plastic lens to show different images as the viewing angle changes. The lens sheet is not just a cover; its pitch, thickness, and clarity affect how the images appear. A pitch mismatch can create ghosting, where parts of two images remain visible at once. Small errors matter.

The printed images must be interlaced to match the lens pitch. Even slight shifts during printing or mounting can soften transitions and make motion effects feel jumpy. A clean alignment test is essential. Use a proof with bold shapes and clear edges before committing to fine details. Tiny text and delicate patterns can disappear beneath the ridges, especially when viewed from too close.

Ink density and surface quality also shape the result. Heavy ink may reduce brightness, while uneven coverage can make colors vary across the sheet. Design for the intended viewing distance: larger shapes often read better from farther away. Keep the background simple when the image changes. There is a trade-off here; adding more frames can create smoother motion, but it also leaves less image detail in each frame. A carefully checked sample can reveal problems that a digital preview misses. And sometimes, the effect still looks less smooth than expected.

What Is 3D Lenticular Printing? - Materials and Design Factors That Affect Print Quality

3D lenticular printing combines multiple views into an interlaced image placed behind a sheet of tiny cylindrical lenses. As the viewing angle changes, the lenses direct different image strips to each eye, creating a perception of depth. Results depend on the lens material, image preparation, printing, and viewing conditions.

Factor What It Means Effect on Print Quality Practical Design Guidance
Lens pitch (LPI) The number of lenticules per inch in the lens sheet. Common commercial pitches include roughly 20–100 LPI, depending on sheet type and application. The pitch determines how image strips align with the lenses. A mismatch can cause ghosting, softness, or incorrect image transitions. Use the measured or supplier-specified pitch for the exact sheet and printing setup. Do not assume sheets with the same nominal LPI are identical.
Lens material and thickness Lenses are commonly made from clear plastics such as PETG, PET, or acrylic. Sheet thickness and lens geometry vary by product. Optical clarity, surface uniformity, and consistent lens geometry affect sharpness and the stability of the 3D effect. Choose a sheet suited to the intended viewing distance and use. Keep the lens surface clean and avoid scratches, warping, or uneven pressure.
Image resolution and interlacing Interlacing divides multiple views into narrow strips sized and positioned to work with the lens pitch. File requirements depend on the lens, output size, and print workflow. Insufficient source detail or incorrect interlacing can make transitions look jagged, blurred, or visibly separated. Prepare the final-size artwork using the correct lens profile and output specifications. Check effective resolution at the final print size rather than relying only on a file’s pixel dimensions.
Number and spacing of views A 3D file combines a sequence of images captured or rendered from slightly different viewpoints. More views can create smoother motion parallax but leave less image information for each view at a fixed output resolution. Poorly spaced views may produce uneven depth, image jumps, or excessive blur between viewing positions. Use a consistent camera step and a moderate depth range. Select the view count to suit the lens pitch, print size, and intended viewing zone.
Viewing angle and distance The lens design and interlaced image define the range of angles over which the views change. Viewing distance influences how the effect is perceived. An unsuitable viewing position can make the image appear unstable, reduce the depth effect, or reveal adjacent views. Design and proof the piece for its expected use—for example, handheld viewing or a wall display—and test it from typical angles and distances.
Lens-to-image registration Registration is the alignment of the interlaced print with the lenticules, including alignment of lens direction and image-strip orientation. Even a small alignment error can cause crosstalk, ghosting, or the wrong views appearing at particular angles. Follow the production method’s alignment procedure. Confirm orientation and alignment with a physical proof before producing the full run.
Print method and ink Printing may be applied directly to a compatible lens sheet or to a separate substrate that is then assembled with the lens. Ink spread, drying, adhesion, color consistency, and substrate compatibility can affect detail and appearance through the lens. Use materials and inks specified for the chosen process. Evaluate color and fine detail through the finished lens, not only on a flat proof.
Image content and depth range The foreground-to-background separation and differences between views determine how strongly depth is perceived. Excessive depth, abrupt cutouts, or inconsistent subject placement can create visual discomfort and distracting edge artifacts. Keep depth transitions controlled, use clean subject edges, and avoid placing important details across areas that shift sharply between views.
Lighting and reflections Ambient light, viewing angle, and reflections from the lens surface influence how clearly the printed image can be seen. Glare can reduce perceived contrast and obscure fine detail, even when the print and alignment are accurate. Assess proofs under representative lighting. Consider display placement and reflections when selecting the finish and installation angle.

Note: Exact pitch, resolution, materials, and alignment tolerances depend on the specific lens sheet and production process. A physical proof made with the intended materials is the most reliable way to evaluate the finished effect.

Common Uses and Limitations of Lenticular Printing

What Is 3D Lenticular Printing?
Common Uses and Limitations of Lenticular Printing

Lenticular printing places a ridged plastic lens over an image made from interlaced picture strips. As viewers move, the lens directs different strips to each eye, creating a sense of depth. Some designs show a changing image instead. The effect is most useful when people view the print from a suitable distance and angle. Common applications include product packaging, event posters, greeting cards, retail displays, and educational graphics. A layered illustration of a fish, for example, can appear to float above a blue background.

The effect has limits. A narrow viewing zone can make images look doubled or uneven from the side. Bright reflections may also hide details, especially under overhead lights. Fine text and small facial features can lose clarity because the lens reduces apparent sharpness. Production depends on accurate alignment between the printed image and lens, so a mismatch may create visible ghosting. Complex 3D artwork can require extra preparation, and results may disappoint if the source images lack clear depth cues. Not every subject benefits from the effect.

Tips: Test a small proof before ordering a large run. View it at the expected distance and under real lighting. Keep text bold, use clear foreground and background layers, and avoid relying on subtle details. A simpler design often works better. That can be frustrating, but it is worth checking early.

Article Source:

MSIRobot